Showing posts with label recipes. Show all posts

Sunday, September 23, 2012

Bais Yaakov Cookbook: Recipe + Giveaway!

I'm very excited to be back to the blogosphere with an exciting review+recipe+giveaway! 


Introducing the Bais Yaakov Cookbook! 
Want a cookbook of your own? Hop over to www.baisyaakovcookbook.com for 20% off + Free Shipping! 
Or enter to **WIN** one by liking LadyMama, finding the post about the cookbook (it's a picture of my 
mocha cake!) and commenting on the photo! (Yep, that simple.)

The new gourmet Bais Yaakov Cookbook features recipes from the Bais Yaakov community (including prominent teachers and Rabbis' wives) but showcase a plethora of both traditional and unconventional recipes that reach beyond that label. In other words, if you're not Bais Yaakov LadyMama, you're still going to want to add this cookbook to your collection! Even if it does open with an extensive history of Sara Scheinirer (which is very eye opening—read it!). 

The cookbook is surprisingly professional for a project that seems rather "heimish" with its community vibe. The pictures are vibrant and colorful, the directions are written very clearly, and the selection is impressive. The collection of over 200 original recipes include new takes on some Jewish favorites as well as some very original ideas to spruce things up (like the Green Bean Mango Salad or Chilled Strawberry Soup with Walnut Crunch!)

A HUGE, unprecedented plus about the Bais Yaakov Cookbook is that it includes a rather extensive overview of Halachic guidelines in the kitchen. All about kashrus laws, dealing with food on Shabbos, checking food for bugs—you name it! Let's just say there were a few things that were good to learn (I guess I can consider myself a Bais Yaakov student now!). 

It also helps that thanks to their "All About Wine," "Meat Guide" (is it done yet?), "All About Fish," "Spices and Herbs," "Shopping for Fruits and Vegetables" and even a "Guide to Cookware" and "Kitchen Gadgets" section (what exactly is a poultry shear?),  I am feeling pretty confident with my cooking know-how. Like I'm feeling uber smart—though I keep having to open the pages to reference and make sure I am not mixing up which foods go best with Chardonnay and Riesling—but thanks to the Bais Yaakov Cookbook, all the info is there!). 

The Bais Yaakov Cookbook is sure to delight and surprise in that they did not shy away from some more ambitious recipes, or what I would usually like to call "Attempts I wil Never Make at Fancy Shmancy." For instance, Mini Vegetable Wonton Flowers or Layered Turtle Cheescake (ya, you gotta buy it to see what I mean!). And the thing is, the directions are so straightforward and the ingredients so normal that I can for the first time say I am not skipping over those more fancy, complex-seeming recipes. Thanks to this cookbook, I might actually put some things on my table that have people thinking I'm a real balabusta. "Like, how on earth did you make this?!" Yep, thank you Bais Yaakov Cookbook! 

For most my readers, and especially right before Yom Kippur, I wanted to share a simple recipe that would be put to good use, namely for breaking the Yom Kippur fast (I always need a good, moist baked good after a day of not eating!). So I attempted the Mocha Cake! I give it a A+++! It's easy to make, moist and has just the right amount of rich chocolatey mocha flavor (and can even be enjoyed with coffee, believe it or not!). Enjoy!

Want a cookbook of your own? Hop over to www.baisyaakovcookbook.com for 20% off + Free Shipping! Or enter to **WIN** one by liking LadyMama, finding the post about the cookbook (it's a picture of my mocha cake!) and commenting on the photo! (Yep, that simple.)


MOCHA CAKE

INGREDIENTS 
2 cups all-purpose flours1/4 cup Dutch processed cocoa  
2 teasooons baking powder
3/4 cup boiling water
1/4 cup instant coffee
2 cups sugar
1 cup vegetable or canola oil
4 large eggs
2 teaspoons vanilla sugar
COFFEE GLAZE
1 teaspoon instant coffee
1 tablespoon hot water
1 cup confectioners' sugar
3 tablespoons vegetable oil


For mocha cake:
Preheat oven to 350°F. Liberally, grease a 12 cup Bundt pan; set aside.
Mix all-purpose flour, cocoa, and baking powder in a medium bowl. Set
aside.
In a large bowl, mix boiling water, coffee, sugar and oil. Mix well until coffee
and sugar is dissolved. Add eggs and vanilla sugar. Mix well. Add flour
mixture to the egg mixture, whisk to combine.
Pour batter into the prepared pan. Bake 50 minutes. Cool in pan for 10
minutes; remove cake from pan and let cool completely on a wire rack.


For coffee glaze:
Whisk coffee and hot water in a small bowl. Add confectioners' sugar and
oil and mix until smooth, if glaze is too thick, then slowly add more water,
about an 1/8 of a teaspoon at a time. Drizzle glaze over cooled cake.


Let me know if you try this recipe, would love to hear what you think! And be sure to enter the giveaway for the Bais Yaakov Cookbook simply by commenting on the photo on the LadyMama Facebook page!  

Wishing you and yours an easy and meaningful fast! 


Monday, July 16, 2012

[Debunking Healthy Food Myths] Myth #2: Healthy Food Costs an Arm and a Leg

By Shaina Kamman
Shaina is a Board Certified Health Coach. She works with mothers and others who are hungry for change and ready to make healthy food the staple in their home. She is a graduate of the Institute for Integrative Nutrition, the world’s largest nutrition school, and she is also a member of the American Association of Drugless Practitioners and the Weston A Price Foundation.


DEBUNKING HEALTHY FOOD MYTHS
With Shaina Kamman


Myth #2: 
Healthy Food Costs an Arm and a Leg


Let's jump right in with the fact here:

Packaged, ready-made, anything-with-a-shiny-wrapper costs an arm and a leg, and will put a real and unnecessary drain on your resources. In addition, packaged, ready-made, anything-with-a-shiny-wrapper is not necessarily healthy.

So how do we make healthy food that is economical? Well, let’s first remember our #1 Starting Place. Ask yourself: Would my great-grandmother recognize this and feed it to her family? If the answer is yes, you are onto something good!

Today’s simple example is a delicious, deeply nourishing, and easy-to-make soup.

Cream of Broccoli Soup

1. In a big pot, sauté onions and celery in Extra Virgin Olive Oil on a medium flame until translucent. Add in salt and whatever spices you like. 

2. Chop up broccoli and potatoes into 1-2 inch pieces and throw them into the pot. Add leftover chicken soup broth from Shabbos (or whenever else you made it). 

3. Bring it all to a boil, and then simmer until the broccoli and potatoes are soft, about 30 minutes. Then blend it all up with an immersion blender. 

[Some tips: Cilantro Lovers, you can add in half a bunch of chopped cilantro to the pot a few minutes before you blend it. And if you want it really creamy, you can add a tablespoon or two of coconut cream to each bowl. Serve with a piece of whole grain bread and you’ve got a complete meal.]

The soup freezes well and can be brought out again as a super-fast, super-healthy, super-delicious dinner. This is the kind of ready-made that is great!

So what’s so good about it, hmm?

Onions, broccoli, and potatoes are some of the most inexpensive and most nourishing vegetables. Broccoli is high in carotenoids and Vitamin C and contains B-complex, phosphorus, and potassium. It is also rich in chromium, which protects against diabetes, and indoles, which is a potent anti-cancer substance.

Onions contain carotenoids, B-Complex Vitamins, all-important B6 and Vitamin C, calcium, magnesium, potassium, and sulphur compounds. They improve kidney function, lower cholesterol, have anti-bacterial qualities, and are also helpful in breaking up mucus in the throat, lungs, and nasal passageways. Potatoes provide Vitamin C and B-Complex, potassium, calcium, and iron.

Chicken broth is inexpensive to make (and is sort of free is you are using leftovers that would have been thrown out!) and is a real powerhouse nutritionally. Chicken broth, like other meat stocks, contains the minerals from the bones, cartilage, marrow, and vegetables in the form of electrolytes, which makes them very easy to digest and assimilate in the body. It is also rich in gelatin, which aids digestion and has been used to successfully treat many intestinal disorders including hyperacidity, colitis, Crohn’s disease, and many chronic disorders including anemia, diabetes, muscular dystrophy, and cancer. The amino acids that are released from the cartilage into the broth have been used in the treatment of cancer and rheumatoid arthritis. And Rambam and your great-grandmother both prescribed chicken broth as treatment for colds and asthma.

Add it all together and you see that this meal will not cost you an arm and a leg, is delicious, and can be frozen for a quick dinner for when you need it. And is something your great-grandmother and Rambam would be proud of!

Myth #2 has been debunked.

----------

For more information on Shaina’s Health Coaching practice visit www.lifewithin.info and LIKE Life Within on Facebook! Considering if Shaina’s program is the right fit for you? Mention this LadyMama article for a 10% discount on your initial consultation!

Monday, June 25, 2012

[Debunking Healthy Food Myths] Myth #1: Healthy Food Tastes Like Cardboard

By Shaina Kamman
Shaina is a Board Certified Health Coach. She works with mothers and others who are hungry for change and ready to make healthy food the staple in their home. She is a graduate of the Institute for Integrative Nutrition, the world’s largest nutrition school, and she is also a member of the American Association of Drugless Practitioners and the Weston A Price Foundation.


DEBUNKING HEALTHY FOOD MYTHS
With Shaina Kamman

Myth #1: Healthy Food Tastes Like Cardboard


There is a myth going around, and it’s been here for a while. I can definitely remember it from when I was a kid. The myth is that healthy food tastes like cardboard. And I think many of us can attest to that. Who remembers eating those fat-free, sugar-free, low-sodium poser “cookies” that taste like cardboard because they are, in fact, basically cardboard? I do.

But there is a catch. Here is the question: Are those fat-free, sugar-free, low sodium poser “cookies” actually healthy? The answer is a resounding no. Those beautifully packaged little cardboard morsels that will last for ten years on a supermarket shelf are not healthy.  After ten years, if the bugs and the bacteria are still not interested in those things, it’s a pretty clear sign that there was nothing of value to begin with. So- not cookies, not healthy, not yummy. What a bargain.

In our current world, with such vast food choices, how does one identify which foods are actually healthy? It’s easy for anyone’s head to spin, even the intelligent and consciously discerning. When I work with my clientele, I ask them to let go of the “____-free” stigma and switch to something more simple, and much, much more accurate: If it is something your great-grandmother would recognize and feed her family, that is a great place to start.

Let’s start with a simple recipe for Garlic Green Beans:
Steam or blanch green beans to your own desired crunchy/mushyness. In a separate pan, gently sauté garlic in Extra Virgin Olive Oil for about ten seconds. Turn off the fire and add in the drained green beans. Toss it all up, add salt, and serve. Could it be easier? Come on! 


Want to feel good about it?  


Green beans are high in calcium, potassium, and B-complex vitamins. Studies show that, along with other green veggies, they reduce the risk of lung cancer.

Garlic is a rich source of dietary sulphur and selenium, and is great for treating blood pressure disorders, infections, headaches, and parasites. Garlic also contains an oil called allyl disulphate that acts as an anti-bacterial agent in the gut. It lowers cholesterol, prevents cancer, protects again blood clotting, aids in treating bronchitis and emphysema, and strengthens the immune system. BOOM! Drop the Bomb!

Extra Virgin Olive Oil is a wonderful stable monounsaturated fat that is 75% oleic acid, which helps to regulate blood sugar. It is rich in antioxidants and Vitamin E, and above all, it has proven the test of time.

So what do we have here? A delicious, easy to make dish that is incredibly healthy, tastes nothing like cardboard, and is something your great grandmother would be proud of.


Myth #1 has been debunked!
On a side note, when is sent this article to Mimi, she wanted to know: “But are there any legit healthy "foods from the shelf" ideas that are tasty and healthy? Well, everything is on a continuum. Ideally, yes, if you make it in your kitchen, 95% if the time it will be better for you than packaged. When you cook, you probably don’t add toxic preservatives, food coloring, or the cheapest yuckiest oils available. However, that being said, I also have a quick tip for buying packaged anything. If you can pronounce the ingredients, go for it. If you can’t, its likely more related to plastic than food.


----------


For more information on Shaina’s Health Coaching practice visit www.lifewithin.info and LIKE Life Within on Facebook! Considering if Shaina’s program is the right fit for you? Mention this LadyMama article for a 10% discount on your initial consultation!

Thursday, May 31, 2012

Guest Blogger: Fast, Simple and Yummy Recipes

Submitted by Moussia Kohanbash
Moussia lives in Pittsburgh with her husband. In her spare time, she blogs at  www.fashionfirecracker.blogspot.com, all about her busy life cooking super fast and easy meals, traveling the world, and  gaining inspiration from all around to create fashionable, modest and affordable looks.


Fast, Simple, and Yummy
Submitted by Moussia Kohanbash


"Fast, Simple, and Yummy" is the mantra I use when I enter the kitchen. I want good food, and I want it now (the disease of instant gratification.) So for you dear reader I did my research and found the fastest, healthiest and most delicious way to cook your most basic entres that are sure to be palatable to both children and adults: pasta, salmon, chicken, and brisket/french roast. These have been tested and deemed worthy by many a Shabbos guest and so please share them and use them so they may please many taste buds in the future!


Macaroni Muffins


  • 2 cups uncooked elbow macaroni
  • 1 tablespoon butter
  • 1 egg, beaten
  • 1 cup milk
  • 1 1/2 cups shredded sharp Cheddar cheese
  • 1 1/2 cups shredded mozzarella cheese
  • 1/2 cup seasoned dry bread crumbs
  • 2 teaspoons olive oil - I splurged and use truffle oil and it made SUCH a difference
  • 1/2 teaspoon salt


  • Preheat the oven to 350 degrees F (175 degrees C). Grease a muffin tin with nonstick cooking spray. In a small bowl, stir together the bread crumbs, olive oil and salt; set aside. 

  • Cook macaroni and return to the pan; stir in the butter and egg until pasta is evenly coated. Reserve 1/2 cup of sharp Cheddar cheese and stir the remaining Cheddar cheese, milk and mozzarella cheese into the pasta. Spoon into the prepared muffin tin. Sprinkle the reserved cheese and the bread crumb mixture over the tops. 

  • Sprinkle basil and sea/kosher salt for an extra flavor boost

  • Bake for 30 minutes in the preheated oven, or until the topping is nicely browned. Allow the muffins to cool for about ten minutes before removing from the pan. This will allow the cheese to set and they will hold their muffin shape. 
  •  

Baked Salmon
Persian Food from the Non-Persian Bride


1 ½ lbs of salmon
spray oil
1/4 tsp paprika
1/4 tsp seasoned salt
1/4 tsp salt
1/4  tsp pepper
1/2 tsp garlic powder or 3 cloves of minced garlic
3 tbsp of olive oil

Place fish in sprayed pan. Rub fish with seasonings and olive oil. Bake for 25 minutes at 350
Chicken
Adapted from Quick and Kosher


1 chicken
1 ½ c. honey
½ c. soy sauce
1/4  c. olive oil
2 tbsp garlic powder
1 tsp black pepper
Mix all and bake at 350 for 1.5 hrs or to your preference making sure to turn over peices to ensure even baking


    French Roast
    4 lbs of brisket or French Roast
    2 onions sliced
    1 bottle of beer (dark)
    3 tbsp of meat tenderizer 
    6 garlic cloves
    3 tbsp of Montreal steak seasoning


    Wednesday, May 9, 2012

    Cooking w/your Kid (Part 2) + KID-FRIENDLY RECIPES from BusyInBrooklyn.com

    I'm super excited that Chanie from Busy in Brooklyn took up my offer to enhance my post about cooking with my kid. Chanie's blog is FULL of super recipes and creative ideas, all infused with a fresh and joyous take on being a homemaker. 


    She definitely IS busy in Brooklyn, crocheting her baby's pacifier clips and turning even her leftovers into a new awesome dish. In short, she is someone I'd love to emulate but probably never will. So at the least I'm privileged to feature her insights and recipes here. Thank you, Chanie!    Be sure to visit her blog, and like her Facebook page where, among other things, she posts her Shabbos menus that will get you drooling (and most of all, busy in the kitchen!). 

    COOKING WITH YOUR KIDS (Part 2)
    Reasons to Try...and Recipes to Try!
    By Chanie Apfelbaum from Busy in Brooklyn


    Cooking with your kids doesn't just start at the stove-top. I realized this one day when I asked my daughter to get me the mayonnaise from the fridge. "What's that?"she asked innocently. That's when I realized, I had never really shown her around the kitchen. I just took for granted that she knew what soy sauce was and where the spaghetti was stored. From then on, I implemented a new family routine. Every week, when our food order was delivered, my kids would empty the boxes and put everything away. I would teach them what each thing was called, and where it belonged in the pantry or fridge. In no time at all, this became their most cherished activity of the week. Not to mention, mine too. 

    Once they've mastered the ingredient list, it's time to show your kids around the kitchen supplies. Introduce them to different kitchen utensils such as sifters, whisk, and spatulas  and explain to them how they are used (you can do this during the cooking process). 

    Cooking is also a great opportunity to teach your kids about kosher. And I'm not talking about the fish and scales kind of education. I show my children how I inspect fruits and vegetables for bugs, check eggs for blood spots and point out the different kosher symbols on food packaging. They are so curious and eager to learn and just soak it all in like a sponge!

    When it comes to the actual cooking, I find that my kids are willing and able to do anything I ask. From collecting the ingredients, to mixing, pouring, assembling, and even cleaning up the mess afterwards. 

    Chopping and dicing aside, so many dishes can be prepared with your kids help. But mostly, they enjoy preparing the foods that they like to eat. That doesn't mean you have to take out your cake decorating kit and whip up butterfly cupcakes. All you need are some simple, easy recipes that you can enjoy preparing together.

    Here are a few to get you started!


    Fruit Skewers with Dipping Sauce & Crunch


    Ingredients:
    Fruit of choice, such as melon, berries, pineapple, grapes, bananas
    plain yogurt, cottage cheese or sour cream
    Add-ins: good-quality preserves, honey, maple syrup, cinnamon
    toppings: granola, graham crackers, cereal, chopped nuts

    Instructions:
    1. Cut up fruit into bite-size pieces. 
    2. Set fruit out in separate bowls. 
    3. Arrange fruit skewers by alternating different fruit on a toothpick or bamboo skewer.
    4. Mix favorite add-ins into dipping sauce of your choice.
    5. Dip fruit skewers into sauce and sprinkle with crunchy topping of choice. 


    Quesadillas


    Ingredients:
    2 tortilla wraps
    ketchup
    shredded mozzarella cheese
    shredded cheddar cheese
    add-ins of your choice (onions, peppers, olives, mushrooms etc)
    marinara sauce, for dipping (optional)

    Instructions:
    1. Spread ketchup on each wrap.
    2. Spray a pan with cooking spray and heat up.
    3. Place wrap in the pan, ketchup side up.
    4. Sprinkle with mozzarella and/or cheddar cheese.
    6. Add veggie fillings of choice.
    7. Top with 2nd tortilla, ketchup side down.
    8. Press down on the quesadilla with a spatula.
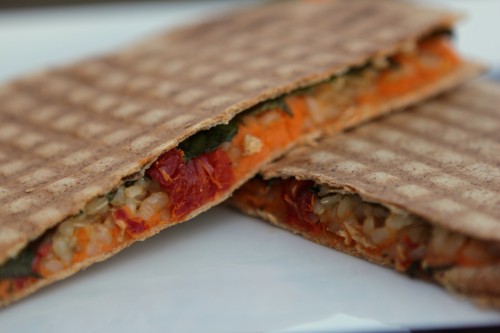
    9. When the cheese has started to melt and the bottom wrap has browned, carefully flip it over with spatula.
    10. When the bottom has browned, remove from the pan and cut into triangles with a pizza wheel or knife.


    Kitchen Sink Cookies


    Ingredients:
    Basic cookie dough (see recipe below)
    Add-ins: nuts, pretzel pieces, chocolate lentils, chocolate chips, dried fruit, rice krispies, marshmallows

    Instructions:
    1. With a hand mixer, cream the butter and sugar until fluffy. 
    2. Add egg and vanilla and mix. 
    3. In a separate bowl, whisk the flour and baking soda. 
    4. Slowly add the flour to the creamed mixture and beat to combine. 
    5. With a spoon, mix in add-ins of choice.
    6. Drop spoonfuls of batter onto ungreased cookie sheet.
    7. Bake at 375 degrees for 12-15 minutes.
    8. Remove from oven and cool.

    Basic Cookie Dough:
    3/4 cup (1 1/2 sticks) butter or margarine
    3/4 cup granulated sugar
    3/4 cup brown sugar
    1 eggs
    1 tsp. vanilla
    2 cups flour
    1 tsp. baking soda
    1/4 tsp salt

    Tuesday, September 27, 2011

    Interview (and Rosh Hashana Recipe!) with "Kosher In The Kitch" star Nina Safar!


    LadyMama had a virtual "sit-down" with Nina Safar, creator of KosherInTheKitch.com.Read her honest take on life in the kitch, her memorable dish flops, great buying tips for the kitch and what she cares about more than Prada and Chanel (you guessed it, her dream kitchen!). 


    Saving the best for last!  **RECIPE!**
    Don't miss the incredible Rosh Hashana recipe Nina shares at the end of the interview! 


    When did you start appreciating food and being in the kitchen?

    Growing up, there was always a warm home cooked meal and yummy snacks waiting for us after school. My moms cinnamon buns and chocolate babka are still my favorite desserts and I love the fact that I can always count on there being freshly baked chocolate chip cookies in her cookie jar!

    What are the challenges of keeping Kosher in the Kitch? Have you ever craved making a non-kosher recipe? Be honest.

    I am a food-show addict. In fact, when I was pregnant with my son I was too sick to eat but still had the usual pregnancy cravings so I would watch “Man Vs. Food” and lived vicariously through Adam Richman. I always get jealous watching him travel the states and sample grub from all over. Thick juicy burgers, cheesy pizza, sweet and savory breakfasts like french toast with sunny side up eggs on top, dripping with syrup. It always looks AMAZING. The orthodox foodie in me is furious that us Kosher eaters don’t seem to have as many options when it comes to eating out. Kosher food does not have to be boring. Why is it that most Kosher spots only serve scrambled eggs and bland potatoes for breakfast? It’s not non Kosher food I crave, it’s the adventurous and unique options non Kosher eaters have available to them that I am envious of.

    Thursday, January 27, 2011

    Couscous with a Kick

    By Liorah Abrams
    Liorah is a work-from-home mom, on staff with Chabad.org and running her own graphic design business. She lives with her husband and two daughters in in Boston, MA where they enjoy working to strengthen the Jewish community. Her husband is a University Professor, so between family, friends, students and clients, she never has a dull moment or an empty kitchen!


    Couscous with a Kick
    (Adapted from Rachel Rey)

    This dish is easy and dynamic, and keeps well on a blech!

    Ingredients
    olive oil
    2 cloves garlic, finely chopped
    1 onion, chopped
    1 zucchini, chopped
    1 tomato, diced
    1 tsp lemon juice
    1/2 teaspoon crushed red pepper
    1/2 teaspoon fennel seeds
    pinch of ground cinnamon
    salt and peper
    1 box (10oz) Israeli couscous
    hot water
    2 tablespoons chicken consomme

    Preparation
    In a large pan with a lid, heat olive oil on medium heat.
    Add garlic and onion and saute 1 to 2 minutes. 
    Add zucchini and tomato, cook for another 5 minutes.
    Add spices and lemon juice, cook for 2 more minutes.

    Measure out water to cook the whole box of couscous, according to it's directions.
    Add chicken consomme and stir, then add mixture to the pan.
    Stir in couscous, cover and reduce heat to low.
    Cook 10 - 15 min's until water has absorbed.

    Remove from heat, fluff, and serve!

    Wednesday, August 18, 2010

    Neshama & Nourishment: Dairy-Free Scalloped Potatoes

    Neshama and Nourishment
    By Liorah Abrams 


    Dairy-Free Scalloped Potatoes
    Neshama: Sometimes in life as in cooking, you will find things you can not accomplish, for one reason or another.  That does not mean that you can not have what you want, only that you must look at things in a different way in order to accomplish your desire.

    Tools:

    1 Small saucepan
    1 Small corning ware (or similar) dish

    Ingredients:

    1 Pint of Coffee Rich Non-Dairy Creamer
    3 Tbsp. Osem Onion Soup Mix
    4 - 5 Large Potatoes, Peeled and sliced thin across the width (making "circles", not long ovals)
    2 - 3 Tbsp. Margarine, softened
    Salt
    Pepper
    Pam Spray

    Thursday, July 22, 2010

    Neshama & Nourishment: Super Caesar Salad

    Neshama & Nourishment
    By Liorah Abrams 


    SUPER CAESAR SALAD 


    A Taste of Torah: As a salad dressing adds a new dimension to Hashem's pure creations - vegetables - so Chassidus adds a new dimension to Hashem's pure Torah.

    Tools
    Large salad bowl
    Small mixing bowl

    Ingredients

    Friday, July 9, 2010

    Neshama & Nourishment: Sizzlin' Spicy Stir-Fry With Quinoa

    Neshama & Nourishment

    By Liorah Abrams

    Taste of Torah: Just as we add peppers to a dish to create diversity, so too we can find ways to spice up
    our connection with Hashem through new, exciting methods of learning, sharing and doing
    more mitzvos.

    Tools:
    One small (2qt) pot
    One large sauce pan with lid

    Ingredients:

    Thursday, June 24, 2010

    Neshama & Nourishment: Pan-Cooked Garlic Herb Chicken

    Neshama & Nourishment
    By Liorah Abrams

    Pan-Cooked Garlic Herb Chicken

    Taste of Torah: Just like there are different methods for cooking foods, there are different paths to the service of Hashem. Each person must follow his or her own process, and let the warmth of Torah prepare them for accomplishing their greater purpose.

    Tools:

    Large ovenproof pan with lid (no plastic handles!)

    Small mixing bowl

    Ingredients:

    4 boneless chicken breasts

    Pam spray

    1 tsp. salt

    1/4 tsp. pepper

    2 tsp. paprika

    1 Tbsp. dried rosemary

    1 Tbsp. dried thyme

    4 garlic cloves

    2 Tbsp. chicken soup stock (powder)

    2 cups of water

    Instructions:

    1. Preheat oven to 450°.

    Mix salt, pepper, rosemary and thyme together in a bowl. Rub into chicken cutlets.

    Generously spray pan with Pam, place over medium heat, add chicken.

    2. Pan sear chicken on stovetop for 4 – 5 min on each side (until slightly golden-brown).

    Mix soup stock into water and add mixture to the pan. Turn heat up to high, and cook until liquid begins to simmer.

    3. Coarsely dice garlic and add to pan. Cover and place in oven for 15 – 20 min. Be careful when removing from oven – handle will be VERY hot!

    Drizzle liquid over chicken and place garlic pieces on top to serve.

    Note: The leftover liquid and garlic make EXCELLENT flavoring for mashed potatoes, or sauce to pour onto green beans.

    Thursday, June 17, 2010

    Neshama & Nourishment: Fast and Fab "Mini" Chocolate Chip Cookies

    Neshama & Nourishment
    By Liorah Abrams 
    [This is not an actual photo of this recipe! Try it yourself to see what they look like exactly! :)]


    Fast and Fab “Mini” Chocolate Chip Cookies
    "As children, we are rewarded with treats for saying words of Torah. As adults, we must continue to find the sweetness in Torah, and then as Torah fills our lives, so will sweetness." ~ Liorah


    You’ll Need:

    * medium mixing bowl
    * baking sheet/tray
    * cooling rack


    Ingredients:

    * 1 cup Brown Sugar
    * 2 tsp. Oil (vegetable or canola)
    * 1/4 cup Margarine (I like Smart Balance Light)
    * 2 Egg Whites
    * 1 tsp Vanilla
    * 1/2 tsp Salt
    * 1/4 tsp Baking Soda
    * 1 1/2 cups Flour (I like using 1 cup white “bread” flour and 1/2 cup whole wheat, but it

    works well with all white or all wheat as well)

    - 1 cup Chocolate chips

    Directions:

    1. Preheat oven to 375˚
    2. Combine brown sugar, oil and ‘softened’ margarine. Mix these ingredients together until nicely creamed.


    2. Add egg whites, vanilla, salt and baking soda, and mix well.


    3. Add Flour and mix. As soon as the ingredients look well blended, add the chocolate chips and mix in well.


    4. Line baking tray with parchment paper and spray with Pam. Use a teaspoon to scoop small piles of dough on to tray.


    5. Bake at 375˚ for 7-9 minutes. Place on cooling rack to cool. Cookies will appear a little soft when taken from the oven, but will continue to ‘firm up’ as they cool.

    ----- ----- ----- ----- ----- 

    Visit LadyMama every Thursday for "Neshama & Nourishment" recipes from the kitchen of Liorah Abrams! 
    Read more about Liorah on the author page!

    Thursday, June 10, 2010

    Neshama & Nourishment: Half-and-Half Challah


    Neshama & Nourishment
    By Liorah Abrams 

    Visit LadyMama every Thursday for "Easier Than It Looks" recipes from the kitchen of Liorah Abrams! 
    Read more about Liorah on the author page! 

    ----- ----- ----- ----- -----
    Half-and-Half Challah
    "Just as the water (Torah) helps the yeast to rise, so may it help our families to grow into something greater, from which we all are nourished." ~ Liorah

    Tools:

    one x-large mixing bowl
    one wooden spoon
    measuring cups and measuring spoons
    baking pans or sheets
    cooling rack

    Ingredients:

    4 1/4 cups  warm water
    1 three-pack  active dry yeast
    a pinch  white sugar
    5  eggs
    1 cup  canola or vegetable Oil
    1 cup   dark brown sugar, packed well
    1 cup   wheat germ
    3 Tbsp  salt
    5 lbs  flour - appx. half bread flour, half whole wheat flour
    1/4 cup  oats - instant or old fashioned

    Prep (30 Min):

    1. Pour two cups of warm water into the mixing bowl.
    Sprinkle a pinch of white sugar and a pinch of flour into water.
    Gently pour yeast on top, rotating packages to spread grains over surface of water.
    Allow to sit for 10 - 20 min, or until yeast is well activated.

    2. Add eggs, oil, dark brown sugar, wheat germ and salt.
    Use spoon to break yolks and stir mixture until sugar has dissolved.
    Add half of the flour (the bread flour half) and stir until it is wet.
    Add most of the rest of the flour, stirring until it becomes too thick to do so.

    3. As you add the last of the flour, mix the dough by kneading. Dough should be slightly sticky without being overly gooey - it may take some patience to reach this point.
    Knead the dough for 2 - 5 minutes after it has become fully mixed. (This can be done inside the bowl or on a flat surface).Form into large ‘blob’ and place in the bottom of the mixing bowl. Cover and leave to rise in a warm place.*

    4. Dough should rise to more than double its original size - when it does, push it down, flip it and re-cover it.**

    5. Take Challah (remove a small piece and make the blessing.)
    Shape dough into 4 to 6 loaves and sprinkle with oats.
    Grease your pan(s) by spraying them with Pam and then sprinkling a thin layer of flour on top.

    6. Bake the loaves at 350˚- 365˚ F (depending upon your oven) for 35-45 min, checking frequently after 35 min.

    When finished, remove from pan(s) and cool on rack for as long as necessary.