
By Becky Brownstein
Becky Brownstein is a wife, mother of five, cleaning lady, chef, program/trip organizer, taxi driver, blogger and all around great gal that lives in Kingston, Pennsylvania. Visit her website at http://spitsgiggles.blogspot.com where she shares all her experiences as a mother with the motto, "When all else fails, laugh!"
LUNCHES MAKE ME CRINGE:
The search for healthier lunches on a budget
(+ 4 lunch ideas you should try!)
The search for healthier lunches on a budget
(+ 4 lunch ideas you should try!)
Lunches. Uch... Just the word alone makes me cringe. It’s the last chore of the night (on a good night) and it’s the hardest. Especially when the cupboards are running low. As soon as you start chucking cereal in a bag, you know it’s time to go to the store.
Last school year I made it my own “Mother-Mission” to make healthier lunches without going over my food budget. I also wanted to get rid of the guilt of spending money on baggies that just get tossed out without a second glance. When I keep to a budget, I have to keep everything in mind. With my budget in mind and with the idea of not over-using baggies, I set out to look for a reusable container that would make that possible.
I found these sectioned ziploc containers.
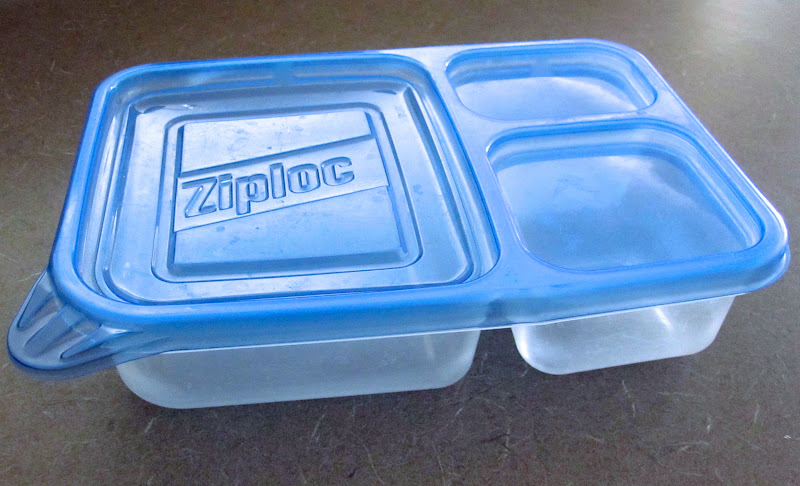
They held up for a few months so I had to replace them in the middle of the year plus, they leaked. A lot. I spent a lot of time saran wrapping the apple sauce inside one of the sections. But it still didn’t cost as much as an actual apple sauce to go cup. Plus, it was one container to clean and it was durable. But the con’s outweighed the pro’s, so this school year I set out to spend a little more money and get something better.
I found this Rubbermaid lunchblox kit.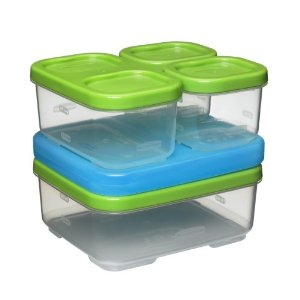
That blue thing in the middle is an ice pack. They are durable, easily washable, sparkle when they are clean and look really cute. The kids like them better since they can grab one container to take out to recess. A few of the con’s are It’s easier for the kids to lose lids or misplace them.
The lids also have potential to get yucky stuff trapped so you have to make sure to clean those out well. I also have so many little containers to wash. But it beats saran wrapping. I fill up a sink tub with hot soapy water and either me or the kids will chuck the containers inside.
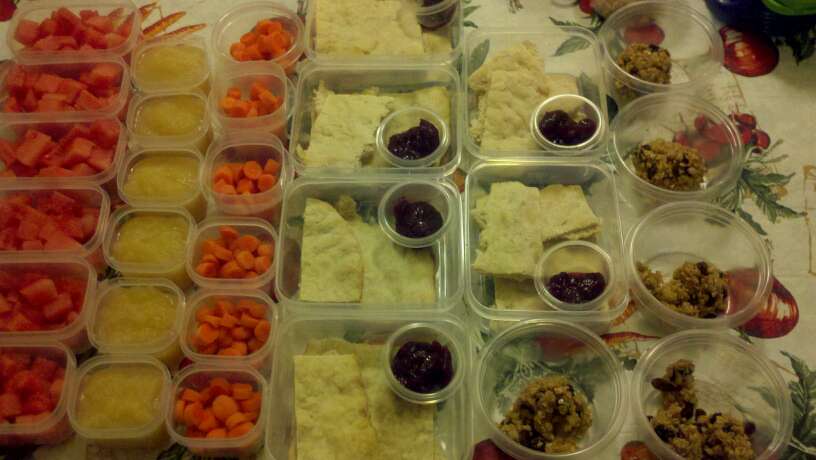
I mainly use the Lunchblox kit for the fresh fruit and vegetables. I use smaller ziploc containers for the carb snacks. I have 1 box of sandwich baggies for the times I must use them (usually for half a cucumber or tomato), or the times my kids ask for extra snacks, but other than those few times, I don’t use them.
When making lunches I try to think of healthy foods that I know my kids will like, not what I hope they’ll like. I usually ask them “will you guys eat green beans if they were in your lunch?” Either they will answer excitedly or look at me like I was insane and yell “no way!” I also try to keep things the same for everyone. If I know all the kids will eat grapes, I’ll put grapes. But if two kids don’t like bananas, I won’t put bananas at all. But if it’s only one kid who has an aversion to that specific food I’ll make an exception. If I had to make different things for everyone, it would make things really hard for me. Plus, there is a greater chance for mess ups.
One time my daughter came home with two full containers of applesauce and said to me “I don’t even like applesauce!” Shortly after, my husband came home and said “I would like to speak with your quality control department please.” He came home with one full container of grapes. He ate the other. So yeah, mess ups happen. Especially because it’s the last chore of the night. Don’t judge!
LUNCH #1
LUNCH #2
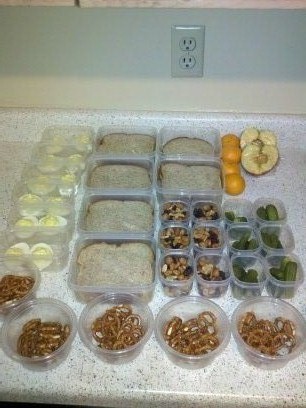
The main dish is tomato, cucumber and lettuce sandwich with a a little bit of mayo. The sides are dried fruit and nuts, pickles, deviled eggs, pretzels and a clementine or half an apple.
LUNCH #3
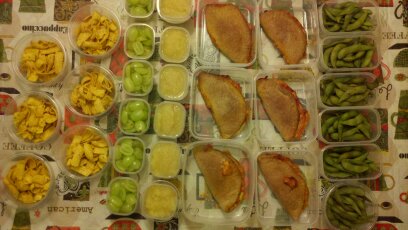
The main dish is a pizza pocket. (I take frozen dinner rolls out while I make dinner and let them defrost/rise until I am ready to make lunches. I then shape them into round circles, add sauce, cheese and mushrooms or olives and bake.) The sides are edamame beans, applesauce, grapes and corn chips.
Lunch #4
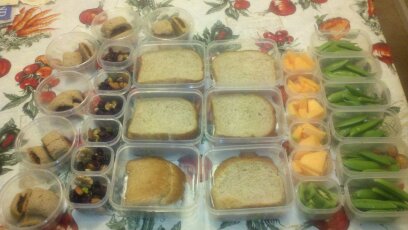
The main dish is a cream cheese sandwich. Not that exciting but the kids could eat those every day. The sides are sugar snap peas, cantaloupe (one is kiwi since my oldest hates cantaloupe) dried fruit and nuts and homemade date bars. (It was my first attempt at these whole wheat bars and I had to agree with my kids that they sucked. I will not be making those again.)
These are just a few examples. I juggle things around, switch around the vegetable options and try to pick things my kids will like. I am not a dietician or a crazy health nut. I just know my kids and know their reaction to overloads of sugar. They crash. Big time! Plus, if I give them sweets as snacks, they are hungry not even an hour later and come home with crazy stomach pains. I used to send them with store bought granola bars but they didn’t feel well after.
After starting to make lunches like these, my kids have been coming home with empty containers and started requesting healthy snacks first when they are home without even realizing it. Because of that I don’t buy a lot of the snacks I used to. It’s a lot healthier and makes them a lot happier. Sugar treats have become just that, treats.
4 LadyMama voices:
can you post your flatbread recipe?
You're amazing Becky!
You're amazing Becky!
Mom
Hi Sebastion, Thanks for commenting!
Flat bread
1 Tbl yeast
2 cups warm water
pinch of sugar
Proof the yeast till very bubbly, about 10 minutes.
Add 3 cups bread flour to the yeast mixture when it's done. Mix well. Add 1 Tbl olive oil and an additional cup of flour. It should be starting to become a dough.
Knead in more flour on an as needed bases. no more than 2 cups.
Prepare a 9x13 pan, jelly roll pan, pizza pan or any other flat pan with some olive oil and a sprinkle of corn meal.
When the dough is formed and no longer sticky roll it out into the pan. Make it as flat as you can. (You might need to shape it into 2 different pans).
Bake at 350 till brown on top.
Variations: You can add tons of chopped up herbs, dried or fresh, into the dough before shaping.
You can drizzle olive oil on top and add tons of herbs, spices, vegetables, olives etc. before baking for a delicious foccacia.
Post a Comment