Tuesday, November 29, 2011

Makeup for Work - Natural, fresh and fast!

By Ettel Chava Rosenbaum
Chava is a 26 year old mother of two girls living in Kensington, NY.  She has been a practicing makeup artist for nearly seven years and recently began doing makeup for the exploding field of religious women's theater...in which she also loves to perform! Chava offers lessons to women, teaching them how to apply their own makeup like a professional. In addition to makeup, her passions are singing, comedy and keeping her kids out of her shoe rack. Chava is available to do makeup for simchas and productions in New York. You can contact her to book a consultation or job by e-mailing beautybychava@rocketmail.com


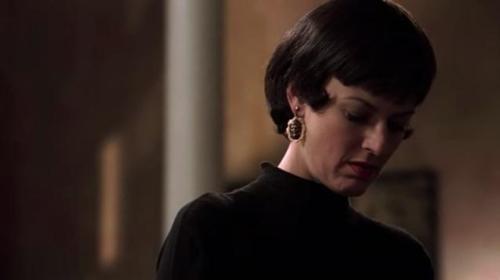
Source: snobka.pl via Ashton on Pinterest
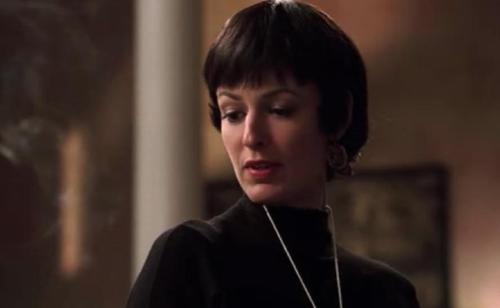
Source: google.com via Shalyse on Pinterest


Makeup for Work

You come seeking a super fast, professional, natural eye look to go to the office with. 

But, Ettel, you ask, How could you possibly know? Ah young wildflower, 'tis my business to know such things. 

You will need:
1. A concealer palette with three or more shades (available almost anywhere makeup is sold)
2. A setting powder, or an off-white matte eye shadow


- Using your ring-finger, take the middle shade of concealer and tap (don't smear!) on your lid. 
- Take the darkest shade, a couple of shades darker than your skin, and tap it in the crease, on the brow-bone or the outer v, wherever  you like it shaded. 
- Use the lightest shade (or even the same shade as the lid)and tap it under the eyebrow. 
- Clean your finger with a tissue, and tap gently wherever the colors meet to blend them. 
- Dust a little powder on it to set, apply a coat of mascara and vamos! 

Viola! Natural, fresh, easy and fast!

[Don't forget ladies, mention LADYMAMA when you book me and get with a 20% discount or a free trial session!] 

Saturday, November 26, 2011

Post #2: Fall Inspiration with Fashion-Isha.com!


Remember my first Fall Inspiration post with Fashion-Isha? Well, introducing installment numero dos! 
                            
Once again, my daring fall looks are accented—no, empowered!—by remarkable pictures that only Sharon could find! Check it all out here!And make sure to check out Fashion-Isha's ridiculously beautiful and inspiring posts since! She is an incredible blogger who finds (and gives away!) awesome stuff! 


Sharon (remember her LadyMama guest post on Ways To Wear Black?) is a real modest-fashion aficionado. I am constantly in awe at how she finds the most amazing "divine and refined" looks to share with her followers (seriously, you must like her Facebook page to see this stuff!). Go read the post and show some love by commenting!


Tuesday, November 22, 2011

DIY Mitzvah Chart with Guest Blogger Rita from DesignMegilla.com!

Rita Milos Brownstein is the author of two books, Jewish Holiday Style and Jewish Weddings(Simon & Schuster) and speaks at events showing women how to beautify the Jewish holidays. She has worked as an art director for several well-known publications such as House Beautiful and Good Housekeeping magazine. She currently has a home decorating business in Connecticut and blogs at designmegillah.com. She divides her time working and playing with her very cute grandchildren Moussia and Yosef.

Do It Yourself: Mitzvah Chart! 

Hi everyone! My name is Rita—you can usually find me blogging over at designmegillah.com but today I am thrilled to be a guest blogger for LadyMama.


I would like to share a project I did for my grandchildren—a Mitzvah Chart. This chart lists the mitzvahs that the children are expected to do each day of the week. In what has become a nightly ritual that the children look forward to with excitement, my daughter Ariel reviews with them the mitzvahs they did that day. If they did the mitzvah, they get to put a magnetic button on the spot for that particular mitzvah. 

They love it when they fill an entire day with buttons, and of course, children LOVE magnets!

I designed this chart for young pre-schoolers who don’t know how to read, but if you have older kids you can replace the pictures with words. Add more or less for your needs.

Here are the supplies I purchased:

1. Colored scrapbooking paper (Michaels Crafts)
2. Package of colorful buttons (Michaels Crafts)
3. Magnetic Board (Michaels Crafts)
4. Both round and strip style magnets (Staples)
5. Large letter stickers (BoBunny Supersized Alphabet Stickers)
6. Press-On 1” white vinyl letters—Helvetica (Staples)
7. Martha Stewart Crafts 1 ½” circle craft punch (Michaels Crafts)
8. Decorative ribbon (Michael’s crafts) (optional)


Before sticking on the large letters that read “Mitzvah Chart” I taped a piece of green painters tape to use for a guide and get a nice straight line. If you don’t have painters tape you can use masking tape or you can draw a light pencil line with a ruler.

Next, I cut out my circles for the days of the week using my circle craft punch. Again, if you don’t have a circle punch you can cut squares out of the colored paper with scissors.
After I decided out how much space I needed for each day, I drew vertical lines with a sharpie marker.

The painters tape helped to keep the tops of the lines straight.

Here is a PDF of some icons to use if you are doing a chart for toddlers. You can add your own, too.


After mounting the icons on colored paper, I cut the magnet tape and applied to the back of the icons. This way, they can be changed as needed. I also added the white vinyl letters to the colored circles for the days of the week.


The buttons got a drop of glue from a glue gun to stick onto the round magnets. If you don’t have a glue gun, I suggest using goop glue, found at most hardware stores.

As a finishing touch, I glued a decorative ribbon around the board to create a bit of a frame.


Please visit me at www.designmegillah.com for more great ideas!


Monday, November 21, 2011

Style Spy Sunday: In Motherly Fashion

I went to a dinner tonight and got to use one of my favorite clutches, this metallic pouch that seems to go with every outfit! I highly recommend every LadyMama to have one clutch that can be worn with everything, so you don't have to fumble around trying to match the right one when you're already freaking out about your hair, makeup and shoes! 


Looking fancy—red carpet and all. But no, there are no keys to our Porsche in there...


So what do I put in my evening clutch? 
My ID, some cash, chapstick and—by the night's end—CANDY! 
There was such an awesome candy table at the viennese that I just had to 
grab some jelly-beans, candy corn and taffies...for my son, of course! :)

...instead, I've stuffed it with candy to bring home for my toddler. (Okay, fine, so I snuck one for myself!)

Although this Style Spy features myself, I'm still including it as a spy because...well..let's just say I SPIED the goods and hoped no one was SPYING me! ;) 

No matter where I go and what I wear...
...at the end of the day, I'm just a mom. 


Wednesday, November 16, 2011

Mad About 60's Fashion—w/Guest Blogger Elisheva of Bellabusta.com!


Hey LadyMamas! 
I'm very excited about featuring Elisheva Blumberg's pickings from 60's fashion, inspired from a television show that—whether you watch T.V. or not—is very inspiring in the modest fashion arena! Go check out Elisheva's blog and follow her on Facebook! She has a keen eye for great looks, gives thorough advice (like her latest post on pairing booties with skirts!) and always has a fresh take that is easy to translate into our every day desire to be beaaaaaaautiful! 

---------->>And don't miss her Facebook giveaway at the end of this post! 
<3, Mimi 


Mad About 60's Fashion!
By: Elisheva Blumberg from Bellabusta

The 1960's are having a fashion renaissance now. There are so many gorgeous, feminine and show-stopping 60's looks that can be easily adapted for a modern as well as modest look.

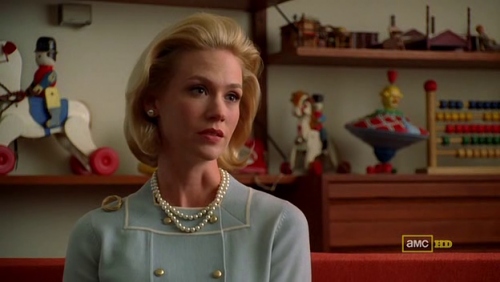
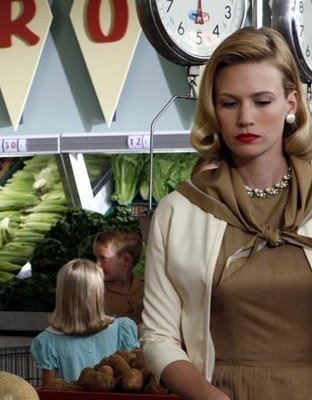
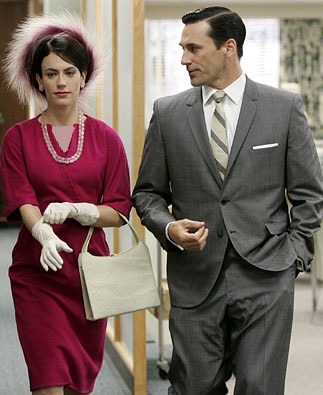
Here are three fabulous and feminine 60's looks that you can bring into the 21st century - all inspired by characters from the 60's era show "Mad Men!"

Look #1 Prim and Proper
The early 60's maintained the rigid women's roles of the previous decade. Although there were women in the workplace, they dressed in a very feminine fashion. Dainty accessories, perfectly placed hairdos and classic silhouettes ruled.
Try this:
To get the ultra-feminine look of the early 60's without looking too costume-y, you'll need a few updates. Start with a brightly-hued dress in a ladylike shape and build the outfit from there. It used to be a fashion necessity to match your accessories with your dress, but now it's just the opposite. Mix things up with an animal print blazer and pumps in a contrasting color. A vampy nail color keeps the look modern. And if you feel up for a something daring, try a  fascinator headband, which is fresh but echoes the hats of the past.

So 60's - Prim, Proper & Posh


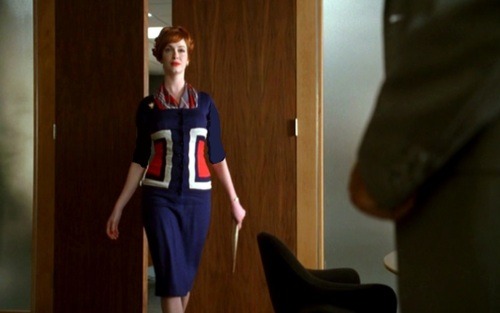
Look #2 Thoroughly Modern Mod
The mod look of the 60's was totally different than anything that can come before it. Bold graphic lines, op (optical) art, straight silhouettes and primary colors shouted youthfulness, demanded attention, and captured the hearts of women who wanted to break free from old social standards.

Try this:
Today, color-blocking is back. For a more contemporary and wearable look, try a two-toned skirt paired with a simple white button down. Go wild with accessories that channel modern art.

So 60's - Thoroughly Modern Mod


Look #3 Bella Beatnik
Beatniks were the original hippies. They're radical political ideas and taste in music and fashion set them apart. They wore a lot of black, simple silhouettes and displayed their open mindedness with unconventional accessories (like ethnic jewelry).
Try this:
For frum women, this will be an easy look to imitate! Start with a base of all black (almost too easy...) and add daring and offbeat elements to complete the outfit.

So 60's - Bella Beatnik


What do you think about these 60's inspired looks? Any favorites?
Come and join Bellabusta on Facebook for the "Year of the Vintage Photo contest!"
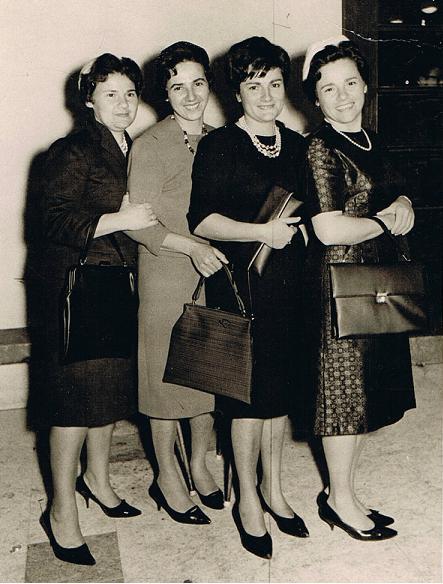
Guess the year this old family photo was taken to WIN Revlon makeup!

Elisheva Blumberg is an FIT graduate with degrees in Fashion Merchandising and Cosmetics and Fragrance Marketing. Visit Elisheva’s beauty and fashion blog, bellabusta.com and “like” Bellabusta on Facebook for tips, trends and beauty giveaways!


Tuesday, November 15, 2011

I really need to stop complaining

Today, I mentally and verbally complained that:

I woke up too early
We ran out of Raisin Bran 
My cleaning lady was 15 minutes late
My drink at Starbucks tasted slightly different 
I don't have a backyard
My toddler is tantrum-y 
I hate my sheitel
Facebook isn't sending me my messages
I need more dressers
My parents don't live close enough 
My toilet is clogged (complaining, even though I have two bathrooms!)
I can't take pictures on my Blackberry
I can't find my blue winter hat
Nothing exciting came in the mail

And then....I saw this:


I bless all my LadyMamas with the strength and clarity every day to be truly happy with what we've been given.  May we all constantly heed this brave man's lessons—but from good things! 

Monday, November 14, 2011

5 Reasons To Look At Your Wedding Pictures

In honor of my anniversary last week, I'm posting some of wedding pictures—accented by my 5 Reasons To Look At Your Wedding Pictures!I hope it can remind all you LadyMamas out there—whether married for one year or 30!—to occasionally look through your album and relive the joy and meaning that was your wedding day! 


1. Get motivated. Whether it's to lose weight or some inspiration to plan a date night, perusing through wedding pictures makes me feel motivated again. It reminds me how things were on the most celebrated day of my life: the body that had the stamina to dance way into the night like a rockstar....the naive, unburdened and limitless love in our eyes. Opening the wedding album is like a little burst of a good self-help book!

2. Feel the love. Of course, the wedding is about you and your spouse. But look at how all your friends and family got dressed up, danced like crazy and showered you with joy. Looking at all the people that attended makes me realize that the people who know and love me create a great big circle of love, joy, care and support.


3. Show the kids. My son has a blast whenever he sees our wedding pictures. "Mama" and "Dada" together—the two people who love him the most— smiling away. I think he wonders why he doesn't see us looking like that on the average day. Maybe that's why he cracks up so hard.
4.  Look how far we've come. I see us as bride and groom and see how much we've changed and grown for each other these past three years. And mostly, how enriched our lives are since bringing our sons into the world. I mean, we were awesome then...but they've only upped our cool-factor.
5. Perspective. Our parents didn't splurge for a big celebration for nothing. They knew that having a beautiful and memorable celebration would always be something to center us, to guide us. No matter where life goes, and what challenges it brings, we have a remarkable beginning to look back to—and remind us that even when years pass since our wedding day, there is something beautiful and true to always return to.


If you're a bride, feel free to e-mail me about my photographer or florists. I will happily rave and provide further information! :)